Windows 10 Start Menu got the visual updates and also become more attractive and user-friendly than the previous versions of Microsoft Windows.
There are many options to customize Windows 10 Taskbar as well as the Start menu. One can give Style and Look of his own choice to make it more user-friendly.

10 Ways to Customize Windows 10 Start Menu:
Here are the quick ways to customize the start menu in windows 10.
1 -Resize the Start Menu in Windows 10:
In order to resize the Windows 10 Startup Menu, just Follow:

- Click Start Menu Button (icon on Left Side near Cortana search bar)
- Move your cursor to the top edge of the Start Menu, so that your cursor looks like a double-sided arrow.
- Just drag the start menu to fit your choice.
- You can also move the cursor to the right side of the start menu screen and repeat the process to resize it.
2 – Pin and Unpin Tiles from Windows 10 Menu:
If you want to add more Tiles (Pin Tiles) to the Windows start menu or want to remove them (Unpin Tiles), then just follow:

- Go to Windows 10 Start Menu
- Right-Click any application (Tile), you want to Pin.
- Click on Pin to Start
Similarly, in order to Unpin the application from the Start menu repeat the steps above and Unpin the tiles.
You have done, in a similar way, you can pin and unpin as many applications from Windows 10 startup menu.
Want to Operate Windows 10 More Quickly: Here are the Windows 10 Keyboard Shortcuts for you
3 – Resize Tiles in Windows 10 Start Menu:
To customize windows 10 start menu tiles, there are a variety of options, select one that fits you.
- Go to Start Menu and Right-click any Tile to resize it.
You have four options to make it: Small, Medium, Wide and Large.
- Just Select One, that best describes your need and can compromise space.

Remember:
- Four Small Tiles = One Wide Tile
- Four Medium Tiles = One Large Tile
Don’t Miss: Windows 10 Fast Startup Settings
4 – Move Tiles in Start Menu:
In order to move tiles within the start menu at your selected position or to rearrange them in groups, just follow:
- Select any Tile.
- Click to drag and drop at the location to move the tile in the start menu.
5 – Group Tiles into Folders:
Usually, the Space of 12 Medium Tiles is considered under one group heading in the windows 10 start menu.
The default groups in Windows 10 are: Life at a Glance and Play
All Programs are Tiles under the above-mentioned groups.

But If you have a number of Programs/applications that has similar to each other that best describe your work and you want to group them in one folder, then just follow:
- Drag and drop the tiles from the existing group to a new place to start the menu.
- Rename the group by hovering at the top of the group folder and clicking on the two vertical lines.
- Enter the new group name of your selected program tiles.
6 – Turn Off Live Updates:
Windows 10 startup menu has applications like Weather or News, that are scrolling and updating whenever you switched over to the Menu.
Somehow or what, if you don’t like the Live updates, then you have options to turn off them.
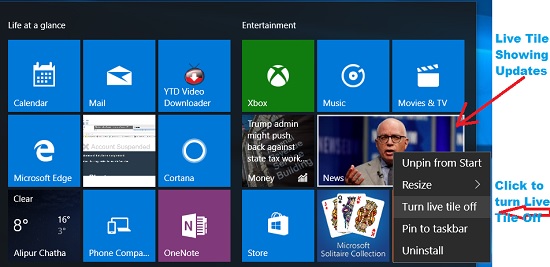
- Click on the Start Menu Button and Select any tile showing the live Update feature.
- Right, Click the Live Tile > Click on More.
- Click on Turn Live Tile Off.
7 – Enable Full-Screen Mode for the Start Menu:
The best thing about Windows 10 Start menu is its customization.
One can enjoy both start menu layouts in previous versions of windows also.
In order to enable full-screen mode in the start menu, follow:
- Click on the Start Menu Button.
- Go to Settings and click on Personalization.
- Click on Start.
- Switch on the option of Use Start Full Screen.
you have done.
Don’t Forget To Read:
- Follow to Lock Keyboard and Mouse Quickly in Windows 10
- Want to Setup a Proxy Server In Windows 10 – Here is the guide for you
8 – Change the Color of the Start Menu in Windows 10:
To change the color of the startup menu, just do the steps:

- Click on the Start Menu Button > Settings.
- Click on Personalization and then click on Colours.
- Choose the color you want for the start menu.
9 – Choose Which Folder Should Appear in Start Menu:
In order to add or remove folders on the left side of the Start menu ( not in Tiles sections), So that you can easily access them. Just follow the steps:
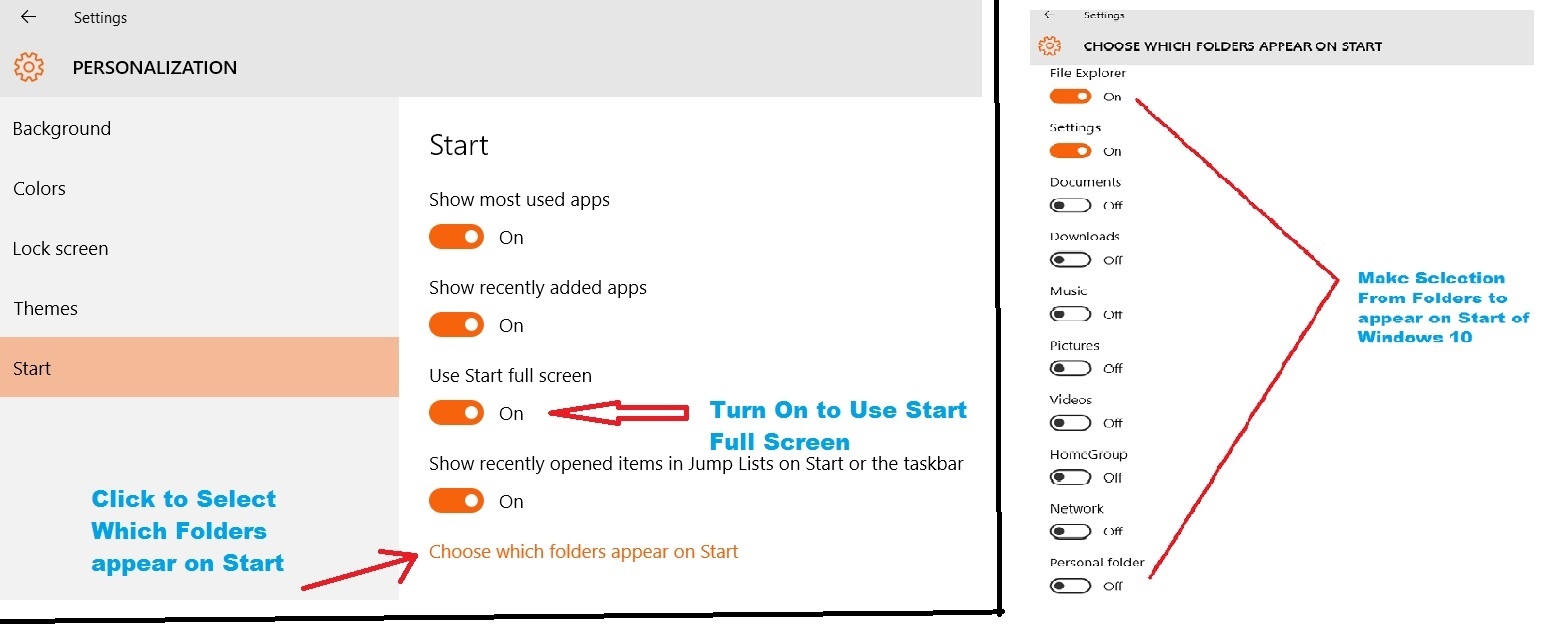
- Click on the Start Menu Button and then on Settings.
- Go to Personalization and then on Start.
- Click on Choose which folders appear on Start.
- Slide the switch under the folder you want to add to the start menu.
- To remove the folder, just repeat the above line process to switch it off.
10 – Remove Suggested Apps from Your app List:
While using the Startup menu in Windows 10, you may have noticed the suggested app’s notification there.
In order to get rid of it, you have options to follow:
- Go to Start Menu Button > Settings > Personalization.
- Click Start and turn off the option of “Occasionally show suggestions in Start”.
So you have learned some of the user-friendly ways to customize the windows 10 start menu.
Watch the video tutorial, explaining how to customize the Windows 10 Start Menu?
There may be other options/ways to customize the windows menu, do comments with your feedback.